Home › How to read a bead pattern
How to read a fuse bead pattern
A bead chart is a grid: one square is one bead on the pegboard. Here is how our charts work, with the pages of the free ghost pattern.
1. Rows and columns are numbered
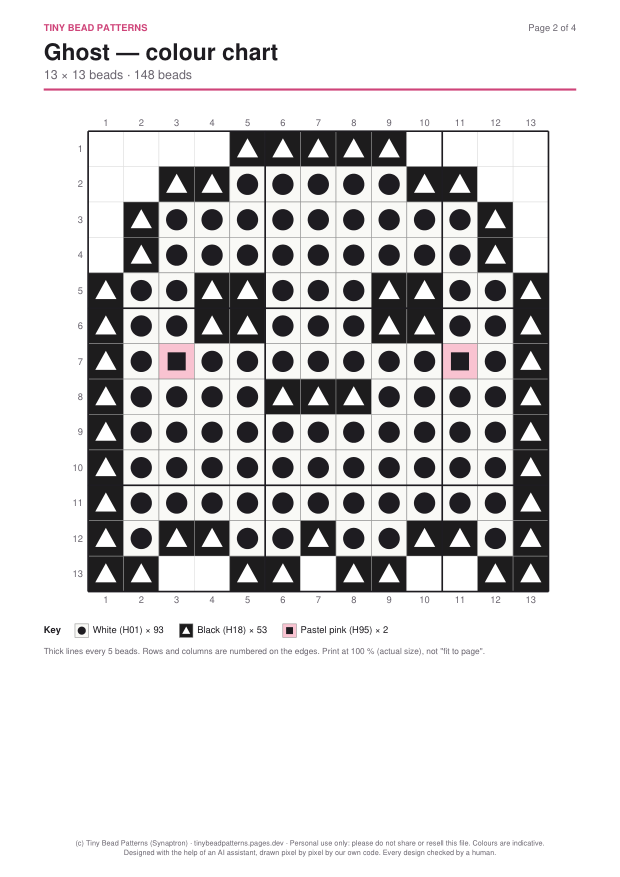
Columns are numbered along the top and the bottom of the grid, rows along the left side. Row 1 is the top row. To find a bead, read its column and its row, like a map: on the ghost, the two pink cheeks are in row 7, columns 3 and 11.
2. A thick line every 5 beads
Every fifth line of the grid is thicker. Count from the nearest thick line instead of from the edge: it is faster and you make fewer mistakes. The pegboard does not have these lines, so place the beads of one block of 5 at a time.
3. Colour chart and symbol chart
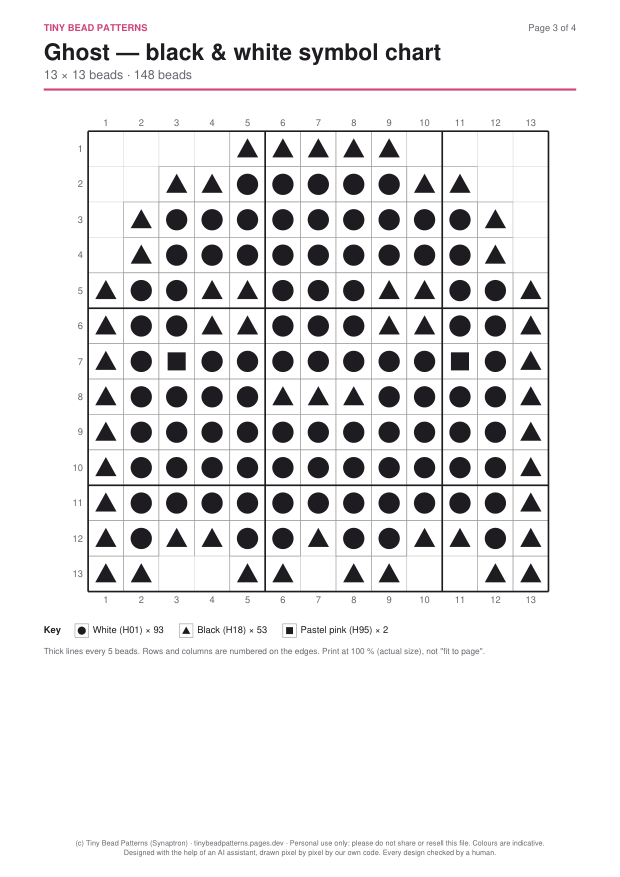
Page 2 of the PDF is the colour chart: each square has the colour of its bead and a symbol. Page 3 is the same grid in black and white: only the symbols. It is easier to read if you print in grey, or if two colours look alike on paper. The key under each grid gives the symbol, the colour, its Hama code and the number of beads. White squares with no symbol are empty pegs.
4. The bead list
Page 4 lists every colour with the closest Hama Midi, Perler and Artkal S codes and the number of beads. Sort your beads before you start, and plan about 10 % extra: some beads roll away.
Tips
- Print at 100 % (actual size), not "fit to page".
- Place the outline first, then fill the inside: the shape is easier to follow.
- Tick off each row with a pencil once it is done.
- Keep the pegboard the same way up as the chart: row 1 at the top.
Try it
Download the free ghost pattern and follow its chart. Then pick a design from the Kawaii Animals or Christmas pack. Next step: how to iron fuse beads.